What is a “subgroup” and why should I use it?
Within Manage Users, you can add subgroups to label specific users. These labels can be used in various places in the platform, including:
-
Filtering users in Reporting (e.g., to check module completion for just your first-year learners)
-
Bulk-selecting users in Manage Users (e.g., for bulk deactivation)
Some common subgroup labels include:
-
Year or Grade (First Years, Winter Cohort, M1/PGY1)
-
Content Focus (OB/GYN Rotation, Cardiac Elective)
-
Instructor (Instructor 1 - AM, Instructor 2 - PM)
Each user many only have one subgroup.
Adding a Subgroup
Adding a Subgroup During User Invitation
While inviting users, there will be an optional Subgroup section on the right for each user type block you add. You can either choose an existing active subgroup (via the dropdown) or create a new subgroup (via the link below the dropdown).
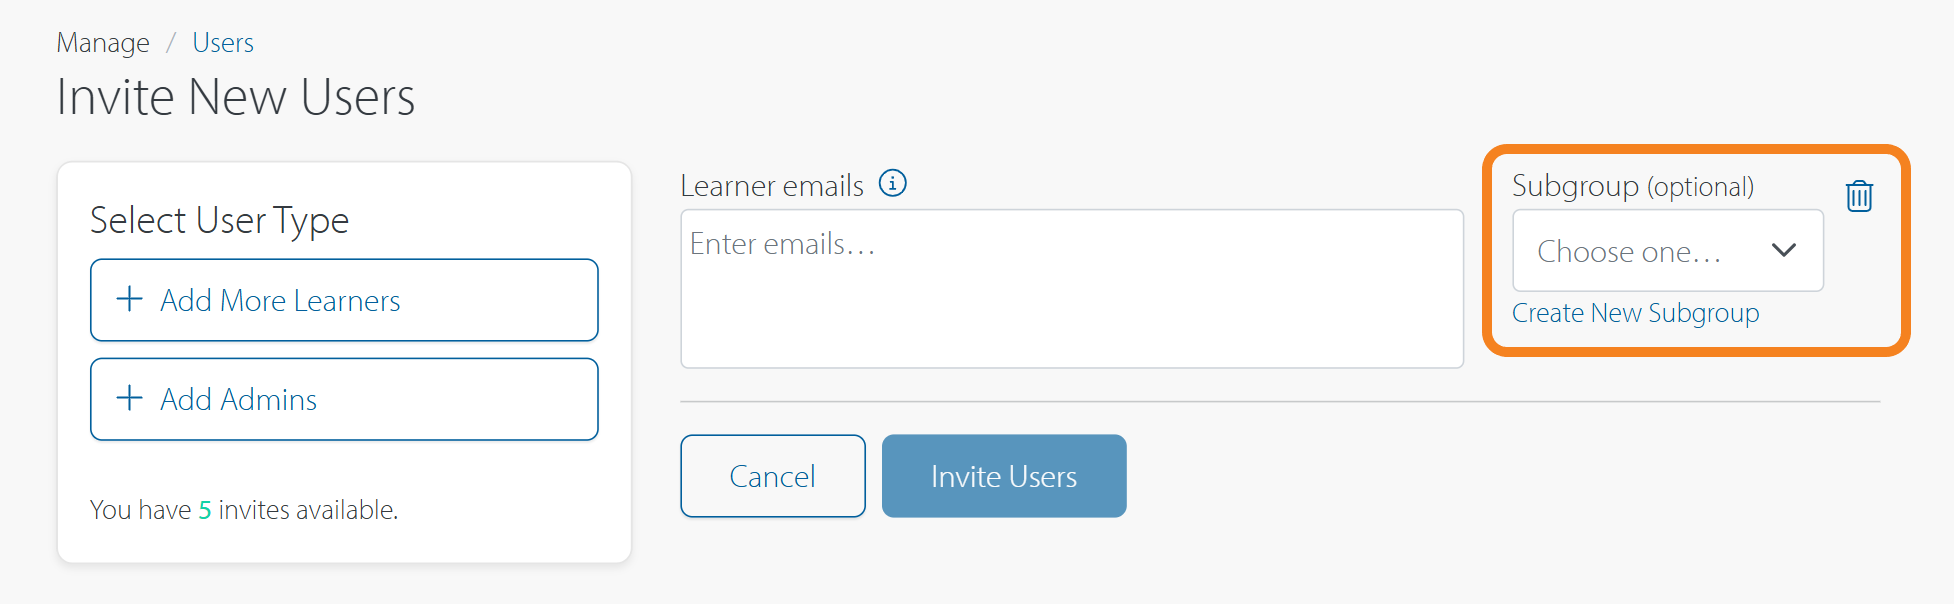
Only subgroups associated with active users will be available during user invitation. Subgroups linked to inactive users will not appear.
Adding a Subgroup to a Created User
For users who already exist in the platform, you can add a subgroup via the Subgroup action at the top of the users table. Select the checkbox next to their name, then click the 'Subgroup' icon above the table on the right (seen in the image below).
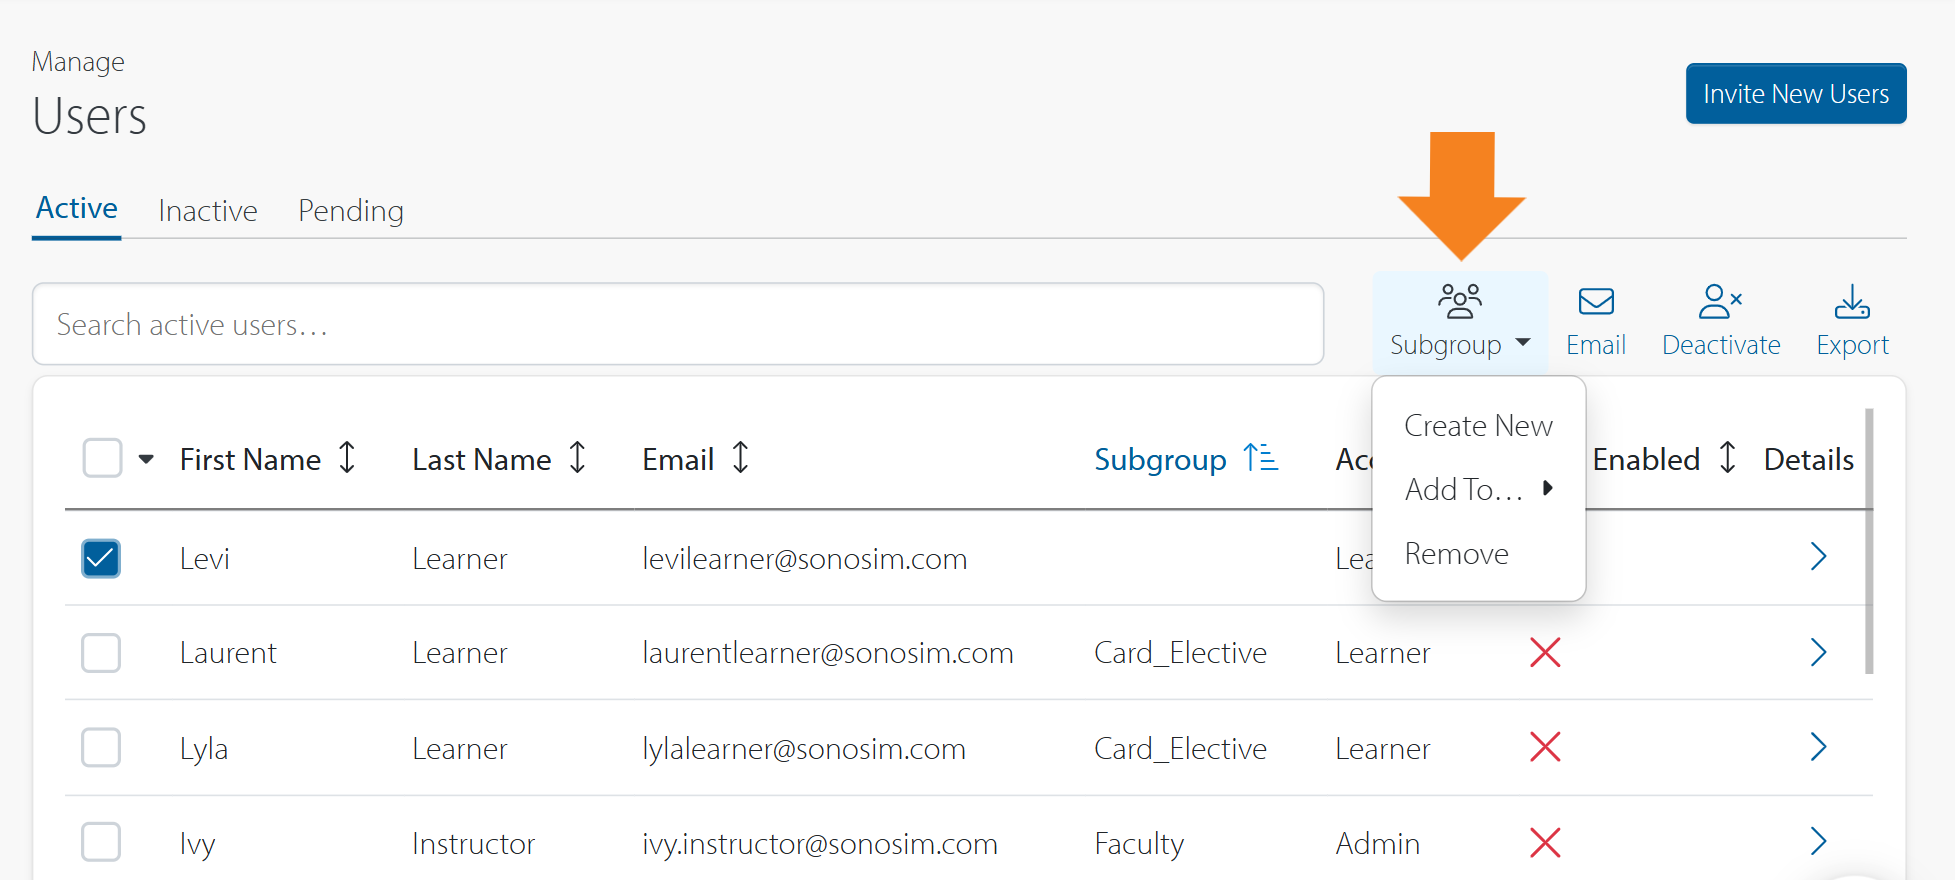
You can create a new subgroup, add users to an existing one, or remove a subgroup.
The “Add To…” subgroup list will be different in the Active and Inactive tabs. Subgroups attached to active users will be seen in the active tab, and subgroups attached to deactivated users will be seen in the Inactive tab.
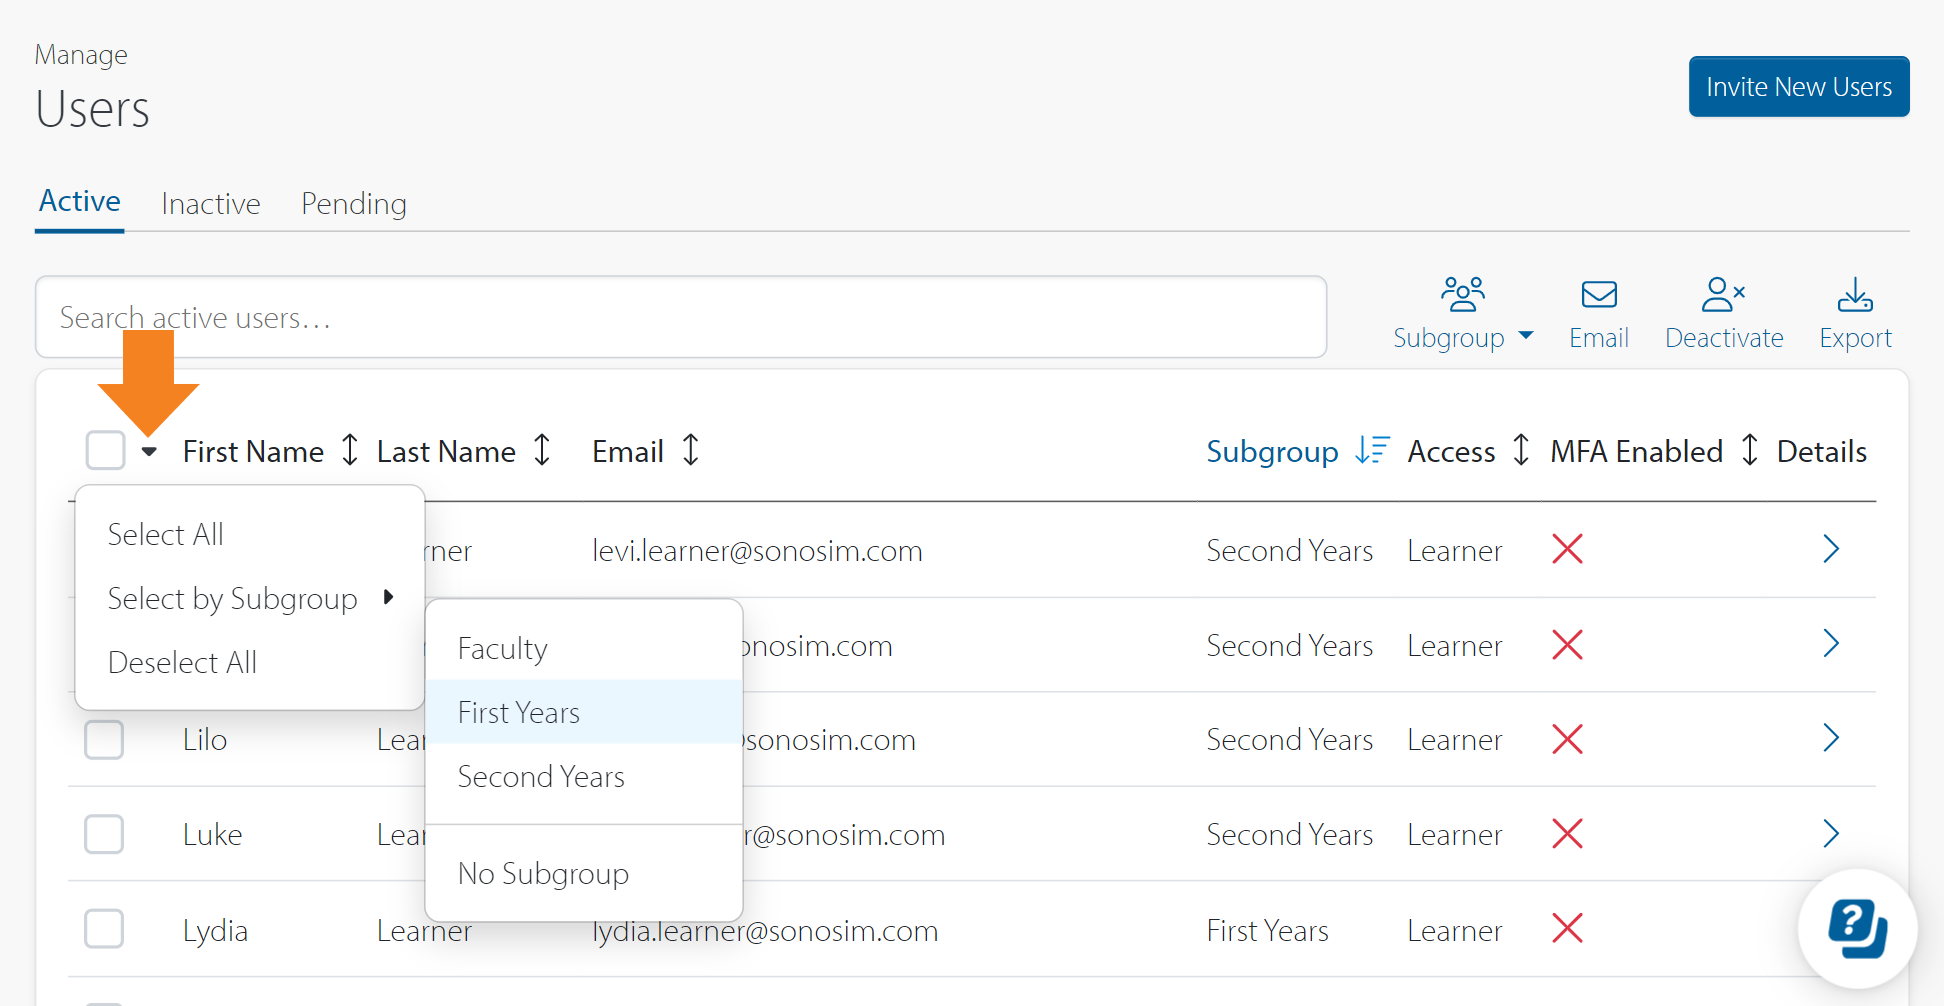
You can add subgroups to multiple users at once by clicking multiple checkboxes in the table.
Additionally, the arrow next to the top-most checkbox has several selection options, including ‘Select by Subgroup.’ This option is particularly helpful when transitioning an entire subgroup (e.g., converting all “First Years” into “Second Years” at the end of the year).
Removing a Subgroup
Select the checkbox next to one or more users' names, then click the 'Subgroup' icon above the table on the right (seen in the image below).
Click ‘Remove’ to delete the subgroup from the selected user(s).
To fully remove a subgroup from the ‘Add To…’ section, it must be removed from all users.
Deactivating a user will not remove their subgroup; however, subgroups for deactivated users will not appear in the Active tab.
Editing a Subgroup
Currently, there is no option to edit a subgroup name. Instead, you will need to fully remove the subgroup from all users and then create a new subgroup.
If a subgroup label is no longer needed, it must be removed from all users in order for it to disappear from the ‘Add To…’ section.
Even after a subgroup is removed from the Active tab, it may still be attached to users in the Inactive tab. Make sure to remove the subgroup in both tabs to fully delete it.
Still Have Questions?
Read Related Articles
- How do I deactivate users?
- How do I change my language?
- My SonoSim account has been deactivated. How do I reactivate my account?
- How do I unblock my account after too many failed login attempts?
- How do I change my email?
- How do I add users to my group?
- How do I add, edit, and remove subgroups?
- How do I reactivate users?
- My SonoSim invite has expired. What should I do?
- How do I reset my password?
- How do I create a SonoSim account?
Contact Support
-
Contact SonoSim Support
-
Give us a call: 855-873-7666
-
Schedule a Support Session